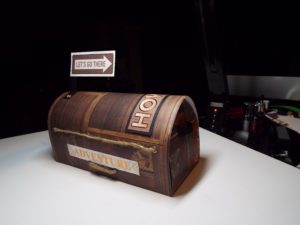

Tools and Supplies:
Xyron 5in Create-a-Sticker
Xyron 1.5in Sticker
Tape Glider
Eyelet Applicator
4” Yarn
2-8” Yarn
5-1/4”x 3/4” Decorative Strip
7- Eyelets
2-1/2”x3” Cardstock Strip
1-1/2×5-1/2 Cardstock (used for background layer)
1-1/4”x5-1/4” Decorative Strip
8-1/2×10-1/2 Cardstock (used for mailbox top)
5×8-1/2” Cardstock scored at 1/2” from edge of long side (used for bottom)
4-1/2”x 5” Cardstock scored at 1/2” around the perimeter. Cut a semi-circle for curve. (used for back)
4”x5” Cardstock scored at 1/2” from the edge of short side. Cut a semi-circle for curve. (used for front)
1/2”x2” Strip (used for handle)

Step 1: Adhere decorations to mailbox top. Take the 1/2”x3” cardstock strip, 1-1/2×5-1/2 cardstock (used for background layer), 1-1/4”x5-1/4” decorative strip, and 5-1/4”x 3/4” decorative strip and run through the Xyron 5in Create-a-Sticker. Layer the 1-1/4”x5-1/4” decorative strip on top of the 1/2×5-1/2 cardstock. Leave 1/8” border around edges. Apply the decorative cardstock to the 8-1/2×10-1/2 cardstock.


Step 2: Embellish with accents. Use the hole punch from the eyelet applicator to create openings for the eyelets. Place the eyelets and then set.

Step 3: Add texture with yarn. Take the 8” and 4” Yarn and run through the Xyron 1.5in Sticker. Jute was used in tutorial and worked really well. Apply yarn through the eyelets and adhere to mailbox top.


Step 4: Fold bottom, front, and back at score lines. Take the 5×8-1/2” cardstock scored at 1/2” from edge of long side (used for bottom), 4-1/2”x 5” cardstock scored at 1/2” around the perimeter. Cut a semi-circle for curve. (used for back) 4”x5” cardstock scored at 1/2” from the edge of short side. Cut a semi-circle for curve. (used for front) and fold.

Step 5: Assemble mailbox. Use the tape glider to apply adhesive to the folded edges and assemble mailbox. Add the handle for the final touch.

